Shading is used to add Color, Texture Mapping, Transparency and Transparency Mapping to Vector Geometry and Titles. If the Quick Editor is not already open select the Q button on the left toolbar to open it.
Shading
Select the polygon at the left. Select the Shading tab in the quick editor. If asked to add shading to the Object say yes. If you are not asked, select the New button to add shading. The Object should now be gray.
Four styles of shading are available. These are Flat, Linear, Cylindrical and Radial. Flat uses a single color. The other formats use two colors.
Select each of the four styles of shading in turn and select the Col 1 and Col 2 buttons. Adjust the color sliders to see the effect.
Select the Linear Shading button on the bottom toolbar. Select "Col 1" and adjust the RGB sliders so that Red=150, Green =200 and Blue=240. Use the left/right keyboard arrows to nudge the slider or type the values into the edit box. Select the "Col 2" button and adjust the sliders so that R=155, G=210, B=155.
Outlines
Select the Geometry Dialog (Geo tab). The Geometry editor can be used to adjust the outline width and color. Adjust the width slider to set the outline width to 2. Adjust the RGB sliders to set R=145, G=180, B=150.
Transparency
Select the Title above that says "Transparent Flat Shaded Title" and select the Shading dialog in the Quick editor. This Title has a transparent flat shading component assigned to it. Try adjusting the transparency between 0 and 100 to see the Effect. Select Linear shading and adjust the Col 1 and Col 2 transparency settings.
Do not place place a transparent Object over a Text Object when publishing HTML.
Transparency is calculated by re-rendering into the background when a project is being published in HTML. This works well if the transparent Object is over a Title or Vector Graphics. Text however, is calculated and displayed by the browser depending upon which fonts are available and the size of the Browser window. If will produce incorrect results when a transparent Object is placed over a Text Object. This is not a problem when publishing SVG. The following advanced features are available in Web Engine and SiteSpinner.
Advanced Shading (Web Engine and SiteSpinner)
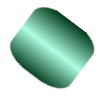
Select the rounded rectangle at the left. Select the Shading Button on the Components toolbar at the left (a picture of paint pouring from a can) or select the Editor Button in the Quick Editor to open the Advanced shading dialog. Say yes when asked to assign Shading.
Select the "Fill Settings" dialog.
Select the Linear, Cylinder and Radial shading buttons in turn while adjusting the color sliders. Press the two color boxes at the left of the sliders to switch between color 1 and Color 2.
Select the RGB or HSB buttons to set the color sliders to the color model your prefer.
Select Radial Shading and set the top color to Dark Blue and the bottom color to a very light blue (r=200, g=250, b=255).
The large color box contains a shading vector, Use your mouse to move the shading origin so that the highlight is near the top left corner.
The end of the shading vector is used to change the direction of Linear and Cylindrical shading. It has no effect on Radial shading. Try switching to these two shading modes to see the effect of adjusting the direction of the shading vector.
Exit the Shading dialog to save your changes.
Texture Mapping (Web Engine and SiteSpinner)
Any supported image file can be used as for Texture Mapping. A Texture can be applied by Scaling, Stretching or Tiling the image.
A Scaled texture will be scaled to find the best fit on the Object without distorting the texture. This may leave some areas of the Object uncovered which will be filled with the background color.
A Stretched texture will be stretched to cover the entire Object. This may result in the texture being distorted from its original aspect ratio.
A Tiled texture will be repeated at its actual size until the entire Object is covered.
Select the ellipse Object at the left and open the Shading dialog. Say yes when asked to add shading to the Object.
Select the "Fill Settings" dialog.
Select the Scale Texture button to open the standard file dialog. Try the file "realized1,gif" from the /clipart directory. Adjust the RGB sliders to select the color that will be used wherever the texture does not cover the image. Exit and view. Try rotating the ellipse to see the effect. Turn on Anti-Aliasing and Hi-Render in the Quick Editor Object dialog to see the effect of anti-aliasing to see the texture.
With the ellipse still selected open the Shading dialog again. Select the "Stretch" Texture button and load the "realized1,gif" file again to see the effect.
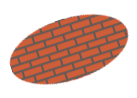
Return to the Shading Editor and select the "Tile" Texture. Select the file "brick.png" exit and view the results.
Anti-Aliasing (Web Engine V2 and SiteSpinner V2)
Select one of the Texture Mapped Objects and select the Object Dialog (Obj tab) in the Quick Editor. Make sure the Anti-Alias box is checked. You can see the effect of anti-aliasing in the work window by checking the Hi-Render box. When Hi-Render is selected, the work window may appear sluggish on slower machines. It is OK to work with the Hi-Render button Off. Hi-Render is automatically selected when you publish or preview.
Turn of Hi-Render and rotate the texture mapped Object Observing the Aliasing artifacts. Turn on Hi-Render to see the effect of anti-aliasing.
Transparency Mapping.
Transparency mapping is similar to transparency except that the transparency will be weighted in favour of the selected color. Transparency is consequently best applied to Image or Texture mapped Objects to produce a Watermark effect.
Select the "Realized" image Object at the left and open the Shading dialog. Say yes when asked to apply Shading.
Check the "Transparency Map" box to enable transparency mapping.
Exit the Shading Editor and select the Shading Dialog in the Quick Editor. Adjust the RGB sliders to see the effect of changing the colors to make them more or less transparent. Dark colors will tend to resist transparency mapping while lighter colors will favour it.