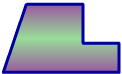
The four Objects above illustrate the different types of vector geometry. These are rectangular, elliptical, polygon and path.
A rectangle Object is created by selecting the Rectangle on the Components toolbar at the left. A square will appear near the center of the work window. Use you mouse to move it to a convenient location for editing. You can drag any corner or side to change the square into a rectangle. To round the corners select the Edit Vertices button. When selected the rectangle will display white control boxes at the top left and bottom right corners. Select one of the white boxes and move it along the side of the rectangle. You will notice that it will only move along one side. You should now see a second white rectangle located at the same corner. Use your mouse to move it along the adjacent side from the first box. As you do, a rounded corner will be created that connects the two points. Adjust both control points to achieve the desired effect. When you are satisfied, click the Object Select button to the right of the Vertex Editor button to return to normal editor mode.
An ellipse Object can be created in the same way by selecting The Ellipse on the left Component toolbar or from the Object menu. To convert the Ellipse into a Pie shape, select the Vertex editor and adjust the control boxes to get the size of Pie desired. Select the Object Select button to return to standard edit mode.
A polygon is created as a series of connected points. As each point is created the next line will rubber band from the last point to the mouse. You can enter sketch mode by holding the left button down while moving the mouse. A new point will be created when the mouse moves beyond a preset distance from the last point. The resolution distance can be changed in the Option Tools dialog. A polygon can be completed using one of the following methods.
Click the first point or press the C key on your keyboard. This will close the polygon by connecting the last point to the first point.
Double click the last point or press the O key on your keyboard. This will create an Open polygon that does not connect the last point to the first.
You can adjust the position of each point by selecting the Vertex Editor. You can then move the white control boxes at each vertex to any desired location. You can also use the Align Bar to snap a control box to a tab position or use the Keyboard arrow keys to nudge the vertex to a precise position. Try that now.
The Shape/Path enables you to create complex geometrise. Click on the Shape/Path tool and click three points - one in the center of the screen, the next at a right angle to it, the next below, and the last at the starting point. Now click the Vertex Editor (left toolbar) to open the Vertex Editor dialog. Try moving the sliders to create complex shapes. You can delete or insert points, or edit the existing points to create the geometry you want.